The Ultimate Tattoo Pain Guide: What to Expect
Thinking about getting some new ink but worried about the "ouch" factor? You aren’t alone. While everyone’s pain tolerance is different, understanding the pain map can help you prepare for your next session.
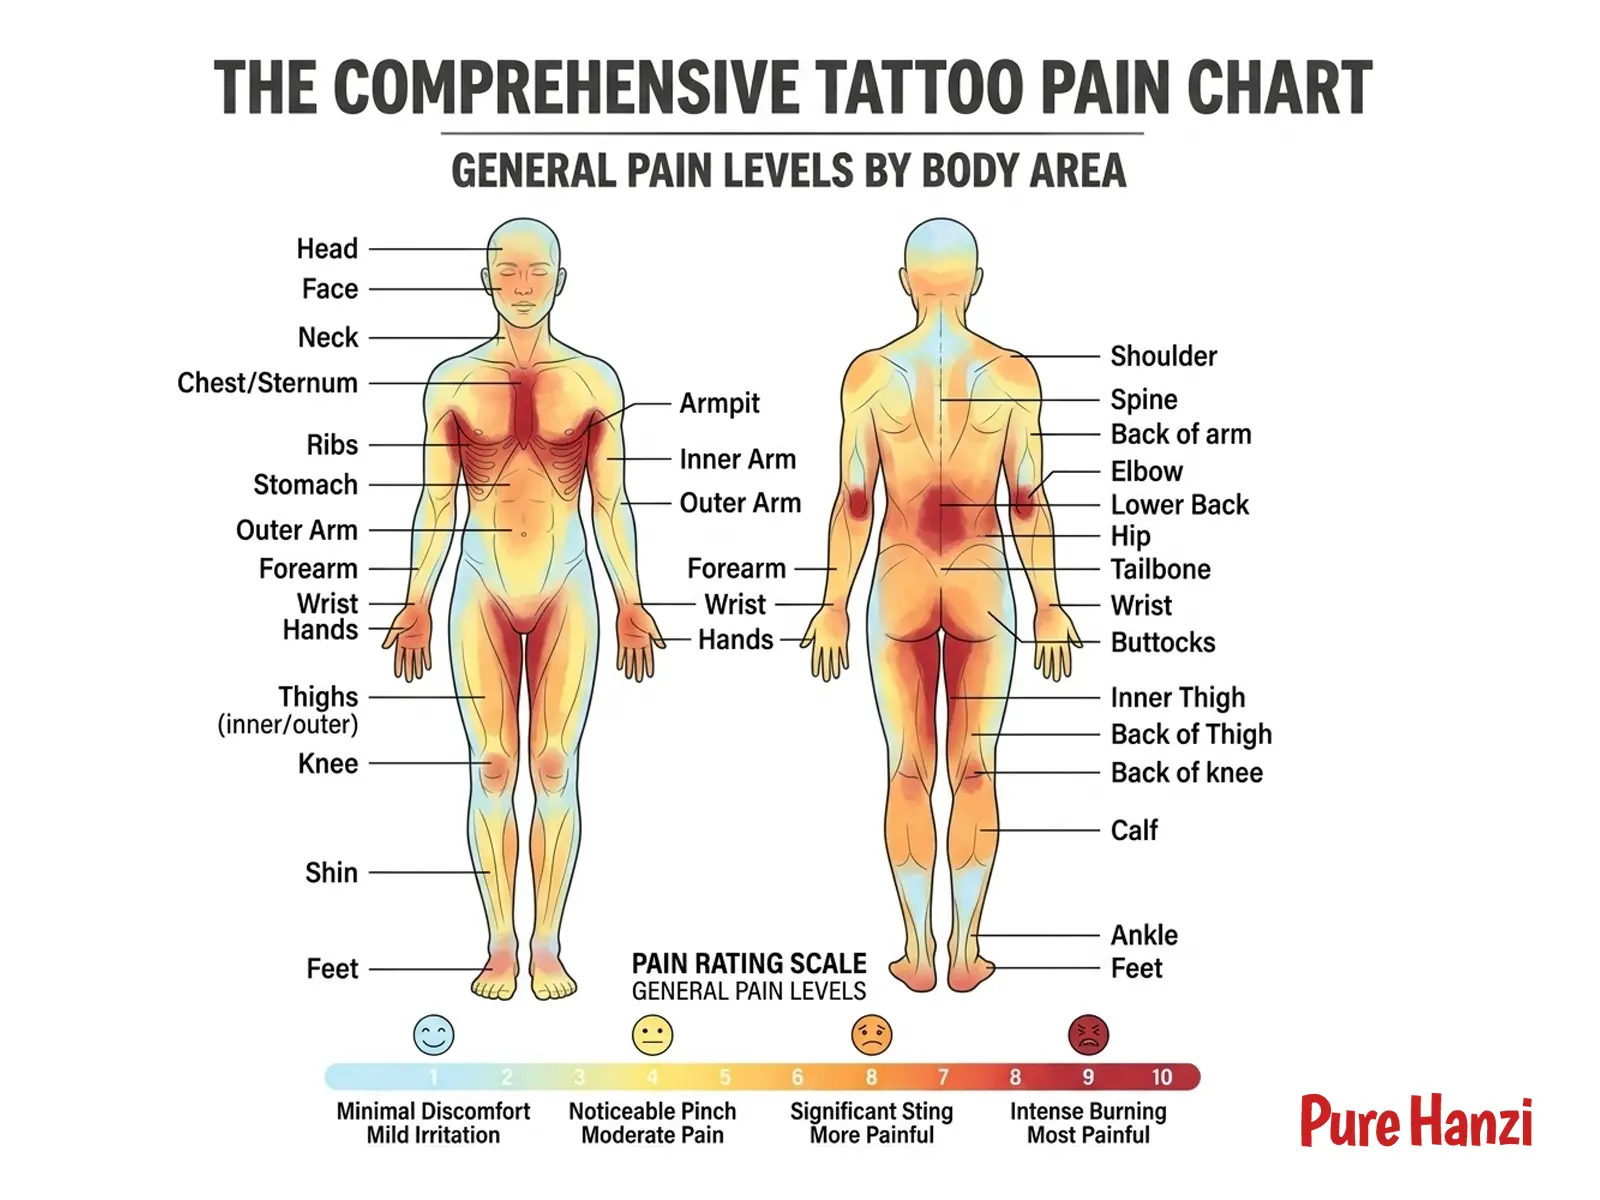
Tattoo Pain Map
The general rule of thumb: the closer to the bone or the thinner the skin, the higher the sting.
| Pain Level | Body Areas |
|---|---|
| Low | Outer arm, forearm, outer thighs, and calves. |
| Moderate | Shoulders, back of the arm, and the fleshy parts of the back. |
| High | Ribs, stomach, inner biceps, and knees. |
| Extreme | Sternum, spine, elbows, feet/ankles, and the head/face. |
Factors That Influence the Sting
It’s not just about where you get it; it’s about how you get it:
- Session Length: Adrenaline wears off after 3–4 hours.
- Artist Technique: "Heavy-handed" artists vs. those with a lighter touch.
- Design Style: Solid color packing causes more trauma than fine-line work.
Pro-Tips for a Better Session
- ✓ Hydrate and Eat: Never show up on an empty stomach to avoid lightheadedness.
- ✓ Avoid Alcohol: It thins your blood and can lead to more swelling and bleeding.
- ✓ Dress for Comfort: Wear loose clothing that allows easy access to the tattoo site.
- ✓ Breathe: Steady, deep breaths help keep your heart rate down and muscles relaxed.